LATEST ARTICLES

Making pixel art for In The Shadows

Thursday, March 22, 2018 11:57 AM

A while back I wrote about how I was making art for In The Shadows. Since the release in October last year, I had some time off from designing visuals for the game so I thought it would be the perfect moment to document my process in more details. It will be a sort of reference for myself and for anyone interested in making a game with the same approach, visual style, or to add to it and make something better.


The art direction and the look of things is always closely related to how I do things, as a matter of fact, how I do things usually dictates it. I rarely make something without knowing how I can do lots of it easily, it’s a manufacturing mindset really. If I come up with things that I can't mass produce, I usually dismiss it. It's not that I will necessarily mass produce it, but figuring out the best way of doing something will help later on if or when I have to do it again. My workflow is usually the simplest, easy approach to solving a problem. My general approach is that having a small number of step to achieve something is not as important as the ability to automate it easily. I will favor multiple simple steps over complex operation, since simple steps even if numerous, are easy to automate later on.


In The Shadows Drawing Board

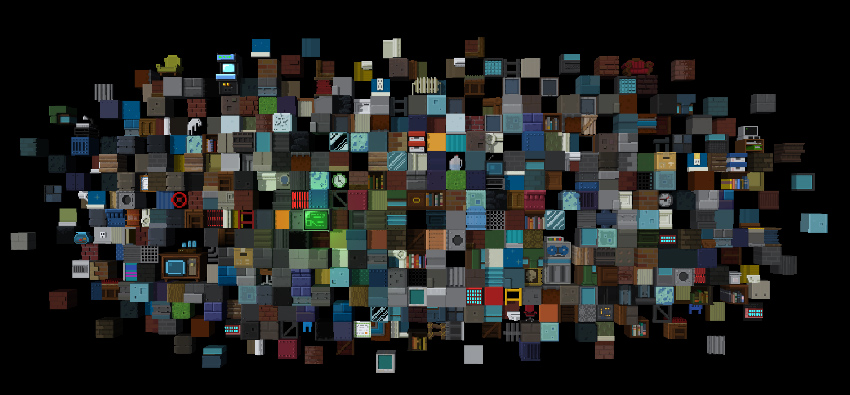
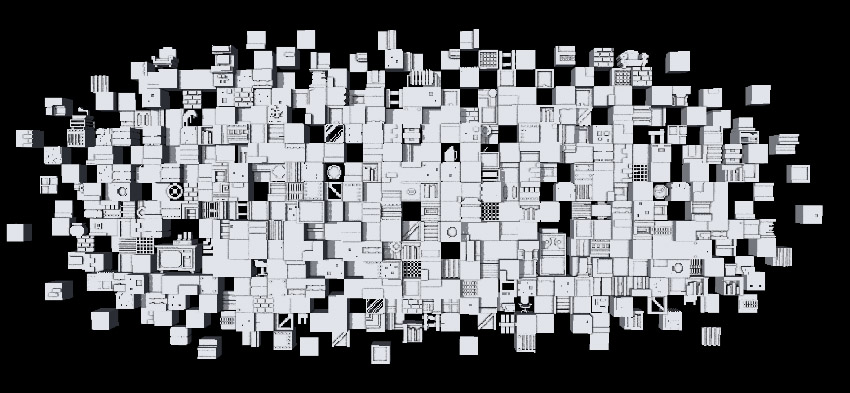
Enlarge / A glimpse of some of the tiles for In The Shadows. Since I had to make a lot of graphics I had to figure out a good workflow.


Of course if my priority is building assets fast, sometimes some other aspects may suffer. For example let's say a certain setup, like in my case the way I am building the voxels; They are made in a voxel editor then exported as 3D mesh. There is some optimization done on the mesh when exported but consider that I work with many many tiles and not one single big object. I end up with hundreds if not thousands of objects in a scene. A workflow decision based on making the art fast can make things heavier to calculate in real time conditions in this case, but for me optimization is often secondary and is dealt with later in production. I do think about it when dealing with stuff that I know will be heavy, but it is not a priority at that stage. Quality is also an issue, but the basic idea is making good looking art fast.


In my case, for the optimisation problem I had, I later merged all those tiles in the levels so that they would share a common shader and cut tremendously the amount of drawing calls for each frames. This was a solution that I knew I would have to implement later to make the game run smoother.


The pixel art look

From the beginning, I wanted In The Shadows to look very much like a 2D pixel art game. My original career background is from the 3D industry, making animated films, and I remember throughout the years seeing so many modern pixel art styled game and wondering why nobody was using 3D lighting techniques to light their scenes. There is a few examples of game that flirt with the idea but none really exploited it completely. What I really wanted to do was 2D pixel art, lit in 3D and casting real time shadows, but still appear like a genuine 2D pixel art game.


Orthographic view VS Perspective view

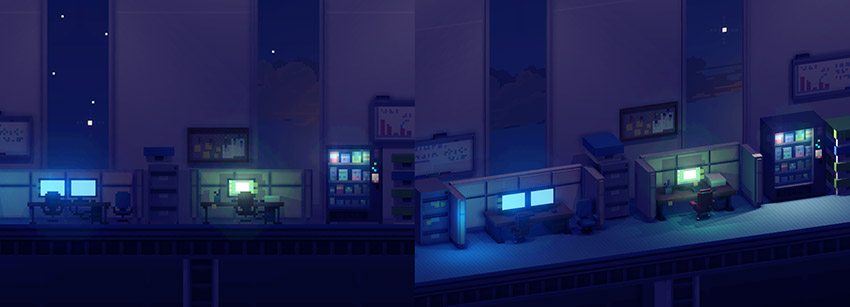
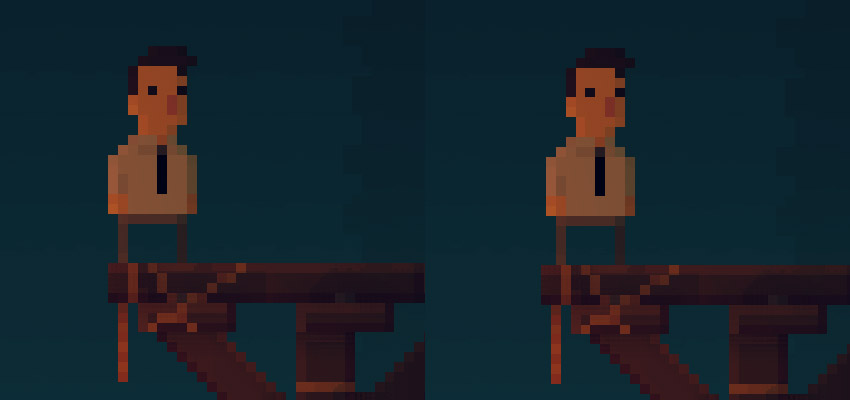
Enlarge / Left: In game orthographic view. Right: Perspective view in Unity. It's a bit sad that we never get to see the view on the right, but at the same time, it makes the view on the left possible, and I really don't see any other way I could have achieved the view on the left otherwise. 


As you can see from the last picture, and might have already known, In The Shadows is in reality completely build in 3D using “voxels” to give depth to the scenes and enabling the possibility of real-time shadows casted from actual geometry. My workflow usually consists of making pixel art design of my objects (tiles) using PyxelEdit and later giving it depth in Qubicle, carving away and extruding, to create the 3D shape that I need. Objects Z positions is based on how I want them to cast shadows but I often have to cheat to cast more or less depending on the situation.


There was a lot of compromises I had to make while working on the game, related to the pixel art look, here are some of them, along with solutions and techniques I used to produce the art for In The Shadows;


Shadows resolution vs screen resolution

For the longest time I was making tests and rendering the scene with up-scaled pixels instead of just blowing up the rendered frame. This made the real time shadows very sharp as you can see on the next screenshots. After working with this setup for a while I got used to that look. I made some tests to see how the whole thing would look like if it was pixel perfect (including the shadows) and I ended up deciding to keep the high-resolution version since I liked that it gave “modern” feel to it. It also made some details look better in some situations.


Comparing hirez vs blow up screen

The "high" resolution render on the left, as seen in the game. You can see the shadow on the right is very sharp and the light fall off on top left is very smooth. Compared to the up-scaled full screen image (rendered pixel for pixel then scaled up) the shadow on the right and the light fall off are both pixelated.


The difference might be subtle for most people or even unnoticeable for some, but I suppose if you want to stay closer to the pixel art look then the image on the right feel more genuine. For me though, I do preferred the one on the left. The fact that the render was also very big made it easier to control light ambient occlusion, which I use throughout the game. On the other hand, it also make the frame rate drop compared to a scaled up low resolution frame. Consider this; on a 1080 display, the pixels are in many cases 4x bigger than what they really are, so if I would just scale up the render it would be like rendering instead 480x270. Instead it's the camera frame that is scaled up, so the light occlusion, shadows, any effects on top of the image is calculated on a full frame 1080p, the art "pixels" are just bigger.


This is something you need to keep in mind when you are making a pixel art game in a 3D engine. Making it truly pixel for pixel, rendered at native size then scaled up will give you way, way better frame rate, especially if you have a lot of full screen camera effects on top of it.


Light ambient occlusion

Enlarge / Light ambient occlusion in game. You don't really notice it in game and I left the option to turn it off but it helps giving more depth to the voxels.


Pixel art style constraints

One of the constraints I gave myself while creating the art for the game was to keep working with tiles that have a multiple of 16x16 pixels. It made things easy to manage and gave it a consistent look, but I soon faced limitations and had to create often much bigger tiles. I still kept the 16x16 size as a default, and would use it as much as I can, but I didn't constraint to it if I needed to.


I think it's important to work with constraint though, when making any kind of art. It forces you to get creative to solve problems. When you have a blank canvas it's easy to get lost and not know what to do. If you constrain yourself, have clear limits about how you can do things, like pixel art in general where resolution is so important, you get very creative. When faced with something that you can't do with the constraints you set to yourself it opens the door to ideas you might not have had otherwise.


Animation

Most of the animation in the game is made frame by frame on 2D sprites. These sprites are rendered in the engine as flat billboards but I also use a normal map on the player sprite to give it more depth. It still enables me to cast shadows on the scene from these sprite and the added normal map on the player character helps a lot to blend the player in the scene. Shadows monsters are mostly black so it was important to keep a good silhouette to make the animation interesting. Keep in mind that this was my first time doing any kind of 2D animation, and looking back at it now I wish I put more time into it, but I'm still happy with the result in the game. I tried to keep a constant level of quality of animation throughout the game, even though the animation was rather simple.


Another compromise was made on the pixel snapping during translation of sprites and camera. In the game the player and camera move smoothly on a “subpixel” precision which make for a more natural movement and more precise control of the player. I decided to keep the movement like this after some testing with perfect snapping made the camera too jittery and the player too stiff. It would have made the 2D style more authentic, but I decided against it. Moving things on a "subpixel" basis does give more precision for the control of the player and camera. You should definitely try both approaches to see what feels better for your game.


Pixel snapping

Pixel snapping on the player movement: Subtle difference. If you look closely you can see the left leg of the player is in between two pixels on the ground. 


Something that is worth trying is moving the player in subpixel space, but still pixel snapping the sprite. This way you would retain the position but visually it would look like a true pixel render. I am not sure how it would feel, or if it would be any different than regular pixel snapping.


Shadow creature look

The shadow creatures also have been through different iterations. One thing that I wanted to try was having the creatures actually made of casted shadows. This was very interesting visually but made things a lot harder to control in the game and much more confusing. It was also counterintuitive since to be able to cast a shadow the monsters need to be lit, and as the mechanics dictate, the monsters transforms into objects when they are in the light.


Some shadow creatures

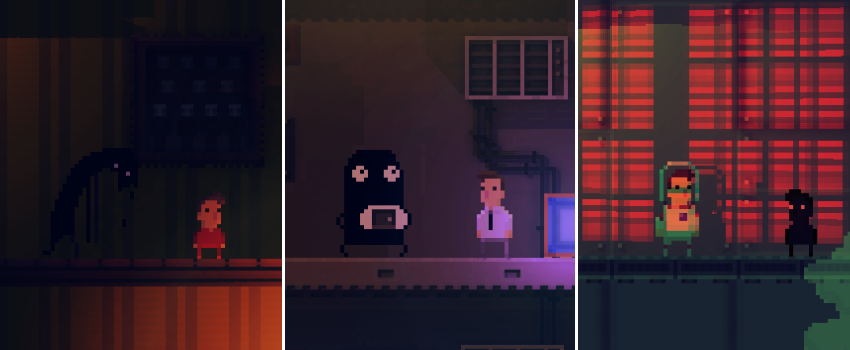
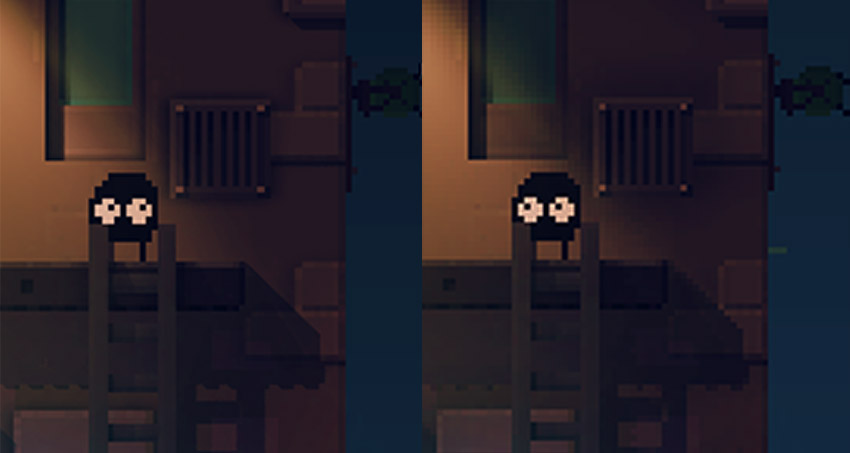
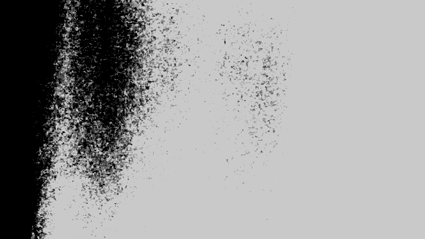
Some creatures lurking in the night


I could have made them transparent (the giant hand shadow in the game is semitransparent) but I also wanted them to "pop" and be easy to notice and decided to do the latter. As you can see in the previous image, even with the shadows completely black, it was still hard to see them sometimes.  Also I did take advantage of the fact that you can't see them well in some situations as part of the gameplay, but it was really hard to balance, making "shadows" pop in a dark environment. The whole thing makes little sense, but in the end it still worked fine I think.


There is something lurking

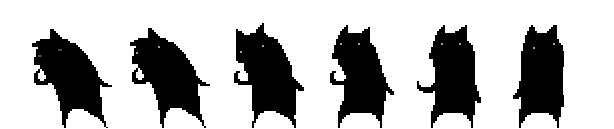
The hand. it's lurking and stalking. It is a piece of the puzzle that links the whole story together.


The hand animation, rotoscoping process

About those giant shadow hands. The hands animations you see in the game are actual captures of my hand that have been cleaned up and simplified. Removing in-between frames also helped make the animation more natural and feel less like pure rotoscoping. I had to "act" those movement and did a lot of takes before I got reference that I was satisfied with, nevertheless I had to splice some of those animation to make them work better together. It's all about the silhouette, when you work in high contrast, basically 1 bit, you need a very distinctive silhouette to understand what's going on.


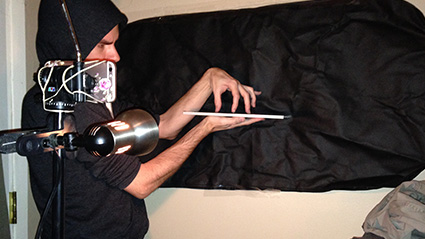
A poor man rotoscopie capture setup. At some point I bought green sheets of cardboard paper to make things easier for myself.


For a time, the hand played a bigger role in the game, being a boss after each world, but even after removing those levels, it still kept its meaning throughout the story, with the ending revealing its true origin. The hand boss level changed the pacing too much, being too oriented on dexterity and timing, and mixing those with puzzle elements just didn't fit with the rest of the game.


Hand shadow boss level designs

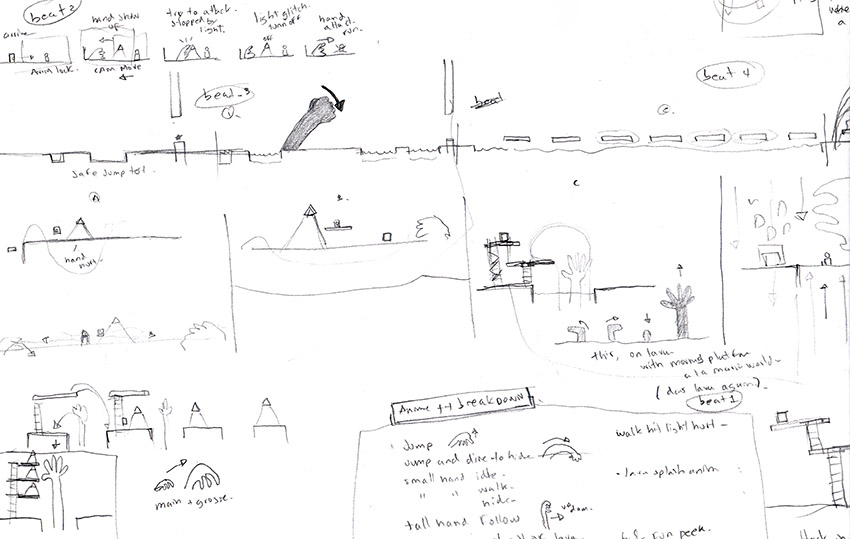
Examples of design ideas for the hand boss. I had a lot of ideas for it, but the first prototypes were just too different from the rest of the game, gameplay wise.


It's important to figure out how you want to create art for your game, and I believe it is a very good approach to make art based on knowledge you already have, instead of trying to achieve something grandiose that you have no idea how to do. Remember that your process and the speed at which you can create the art will have a huge impact on how long you will have to work on that project and ultimately not getting tired of working on the same thing for too long.


Designing puzzles for In The Shadows

Monday, March 12, 2018 8:30 AM

There is a lot of puzzle platfomers out there, but rarely do I find one that balance story, puzzle and visual properly. There is always one thing or another that bothers me. I really wanted to make a game with great visuals, an interesting story and classic platforming puzzles but also making sure that all three aspects were deeply connected to each other. For In The Shadows, I made sure each aspect was there for a reason. Making everything work together is a lot of work, and a puzzle in itself.


Enlarge / That's three years of development


The story of In The Shadows is all about surmounting fears, confronting reality, using the fear of the dark as a symbol. To make everything coherent, everything in the game is lit in real time and cast actual shadows and most of the mechanics are about scaring shadows creature, taking control of them. All three aspects of the game are connected to each other. No gimmicks, a story that is told by the visual as much as the puzzles and mechanics. Making all this work together took a while and was a lot harder than I thought.


Designing for In The Shadows

When I started working on In The Shadows back in 2014, I had already sketched a couple of puzzles using only about three of the monsters in the game I had designed at the time. I think I had about 10 puzzles or so that were interesting enough and I felt confident that I could easily come up with more, considering I had other monster's mechanics in mind already for later. One thing is for sure, there was a lot of challenges when making In The Shadows, but of all of them, making puzzles was by far the most difficult thing I had to do, ever. As much as the graphic felt natural to make and the story was clear in my head, making the puzzles never felt easy.


It was a struggle every step of the way.


Puzzles design, and level design, are in most cases, and in my case, tied up together. Sure, you can focus on the puzzles, put your platform where ever you need and then put pretty visuals around them, but I wanted the puzzles to feel natural, blending with the environment, part of the level visual elements. Add to that the story and the natural progression of difficulty and it soon becomes very complex. I tried to find books on puzzles design but couldn't find anything at all. There is a lot of resources on "level design" but nothing related to what makes a good puzzle good or how to even start with puzzle designing and make it work with level design. It was a very long process for me to figure out, but maybe some of this experience can help others


Level design, from sketch to final design

Puzzle design, from early sketch to the final design. The layout had to change quite a bit since the first sketch.


Puzzles Style

The puzzles in the game are very "classic", in that they are very much like jigsaw puzzles. All the information needed to solve them are in front of you, nothing his really hidden, it's just obfuscated, misplaced, in the wrong order. All you have to do is figure out in which way to do what, or when to do something, or where. There are some "secrets" in the game, but they are part of a second level of difficulty or challenge, the main puzzles solutions, to get out of the room, have no secrets, no fetching quest, just pure puzzles.


Puzzles & level design process

Like any puzzle game, there is a natural progression in difficulty. Each new mechanic has a simple introduction, to teach the player about it, then a twist, then it's used with other mechanics already known. When designing a level or a puzzle, the first idea can come from many places. I don’t follow specific rules, I get inspired by different things and I don’t always start my designs in the same way.


Start with a mechanic

Usually, I start my process by using a basic mechanic, to figure out how it works and see all the possibilities. I would usually get an idea for a monster, let’s say the ladder, and make a test case where using it is very simple and natural. I don’t want the player to figure out the mechanic by mistake, I do want the player to have no real way of going around it without figuring it out, but more on that later.


Testing the sun cycle mechanic

When testing a new mechanic I usually make a placeholder level to see what the possibilities are. This is the first test of the sun cycle mechanic in game


After messing around with a simple setup, I add more steps to the puzzle, or start from the end, and make it increasingly more complex, while considering the limitation of environment. Maybe if I add this other monster here this will happen, or that. There is no way around it, I would just place things around, try combination, until I got something interesting. Sometimes it was very quick, other times it took many iterations, or I would just drop that idea completely. Now that I have a level with a puzzle in it, I would drill it, try to find ways to break it, skip steps, solve it in a way that I didn't plan for.


Once or twice I was surprised to find new ways of solving some puzzles and left it there, because it was either still challenging on the same difficulty as the first solution, or because there was just no way to fix it without dropping the level completely. Either way it had to still be fun thought.


Iterations and tests to get to a final design

For the levels with the day and night cycle I went through a lot of iteration. Here are some examples of designs when I was trying to figure out what I could do with the mechanic, and the final level in the game.


Start with an interesting layout

Sometimes I start with an interesting level design based on the environment, a fun layout that defines the limitations of the set I have to work with. There was a very clear distinction between the exterior level and the interior level each with their own characteristics. For example, the three rooms in the first world, the first actual puzzle you encounter. I had an idea for a puzzle that happen in three room where you had to go back and forth from one to the other in a specific order. I wasn't sure which monster to use or how the layout was going to be in the end, but I wanted to have three rooms and so I started from there. This is risky though, because often these layouts just don't work, but it is a fun exercise to try to fit a puzzle inside an interesting layout.


Design based on an idea for a layout

In this example, I started with a layout I thought would be interesting. Three rooms with a separate passage for the monster and the player. 


In the last picture, the first sketch didn't work once I tried them in the game. I often sketch things too narrow and the distance and size need to be much wider in the game. I had to tweak it and change it a lot through many iterations before I found something that worked. But what make it work well is the sense of misdirection and the fact that even though the solution is simple, figuring it out takes a while since it is not obvious.


Misdirection

A lot of the obfuscation of the puzzles is done by misdirection. The best puzzles are the one where it feels like there is an obvious solution but try to get there and you soon realize that it's more complex and your solution can't work. This is really hard to achieve in practice and is often the result of coincidence in the way the layout of the puzzle is made. Some levels open possibility for obfuscation better than other, but I always try to find ways to do it if I can.


Something you don’t want is unplanned misdirection. If something is in the level, there should always be a reason for it. NOTHING should be there by accident. Because if there are unplanned things in the level the player might waste time trying to solve it in a way that is impossible and tedious. You don't want to frustrate the player because of bad design, his struggle should be his own fault, not yours. You have to design in a way that might feel unplanned, but still have absolute control over the situation. If something is in the level, it has to serves a purpose.


The basic idea for this puzzle worked almost exactly like first sketched

A rare example of a puzzle that worked exactly as planned on paper. I added some more things to it but the basic idea worked perfectly right away.


Unbreakable puzzles

One thing you have to stay very consistent about is the fact that the player shouldn't be able to break any puzzles. No matter the state of the level, whatever the player has done in it, it should always be possible to recover and fix it to solve it, without needing to restart it. In a puzzle game you really don't want the player to wonder if he broke the level, he should always be able to fix it. Otherwise it can be very confusing since they don't know if they are wasting time or progressing. The player should never be stuck. They can feel stuck, but only because of their inability to solve the puzzle, not because they are actually stuck.


Unfortunately, in my case, after lots of testing and after the release of the game, I did find some puzzles that were breakable. Right now, I don’t want to change the game puzzles layout too much since the game is already released. Since the levels are still playable I decided not to modify them for now. When I find a very good solution for those problem I will fix them in the future though. That is still another puzzle for me to solve.


Simple text localization in Unity

Saturday, August 6, 2016 8:07 PM

Localization can help your game reach more people and is fairly easy to do. The best way to do that is having a text file for each languages that is easy to read and edit for people who will translate your text and who might not be technical at all. If you translate your game yourself it's still very practical to have language text files that you can edit with a simple text editor.


The file can be a simple .ini formated file, json or xml. Each format has its pros and cons. I believe ini files are the easiest for human to parse but lack flexibility. Json is easier to parse by computer but hard to understand when you read it. I personnaly like xml, it's still hard to read sometimes but you can always format it in a way that stay simple enough to edit by hand. Also xml has build in support with c# and it's really easy to parse.


For my game In The Shadows I use a simple localization system based on xml files. I am sharing the basics of it here so that you can use it and extend on it if you find it useful. I tried to make the simpliest yet usable localization system I could think of for localizing text in a game here. I guess this tutorial is targeted to people with a moderate level of knowledge of C# and Unity.


XML format

Let's start defining the xml file structure. I will keep the example simple so it's easier to explain. This file will be saved somewhere in your project Assets folder. Save this file as ENGLISH.xml


<?xml version="1.0" encoding="utf-8"?>
<Language LANG="english" ID="0">
  <!-- Main Menu -->
  <text key="MAIN_TITLE">My Game Title</text>
  <text key="CONTINUE">Continue</text>
  <text key="START_NEW_GAME">Start New Game</text>
  <text key="OPTIONS">Options</text>
  <text key="QUIT">Quit</text>
</Language>


The structure here is very simple. Easy to parse and easy to edit manualy. The main root node of the xml file define the language and the ID attribute will be used set the language used ingame. Set a different ID to each language file.


Then I use a "text" node with a "key" attribute and the value of the node is the actual text that we will see in-game. With this system each language has it's own file and you just need to edit the "text" node value for each language. The node "key" attribute stay the same for each language. This file is saved in the Asset folder under the filename "ENGLISH.xml". If you have a file for french name it "FRENCH.xml" and so on.


Now we need a way to read the language xml file content to use the key value pair in the game.


Localization Class

This is a simple class that will read and populate itself with the xml content. You simply need to add this script to an empty GameObject that will stay in all your scenes. Save this file as LocalizationManager.cs


using UnityEngine;
using System.Collections;
using System.Collections.Generic;
using System.Xml.Linq;
 
public class LocalizationManager : MonoBehaviour
{
    public static LocalizationManager Instance { get { return instance; } }
    public int currentLanguageID = 0;
    [SerializeField]
    public List<TextAssetlanguageFiles = new List<TextAsset>();
    public List<Languagelanguages = new List<Language>();
 
    private static LocalizationManager instance;   // GameSystem local instance
 
    void Awake()
    {
        instance = this;
        DontDestroyOnLoad(this);
        // This will read  each XML file from the languageFiles list<> and populate the languages list with the data
        foreach (TextAsset languageFile in languageFiles)
        {
            XDocument languageXMLData = XDocument.Parse(languageFile.text);
            Language language = new Language();
            language.languageID = System.Int32.Parse(languageXMLData.Element("Language").Attribute("ID").Value);
            language.languageString = languageXMLData.Element("Language").Attribute("LANG").Value;
            foreach (XElement textx in languageXMLData.Element("Language").Elements())
            {
                TextKeyValue textKeyValue = new TextKeyValue();
                textKeyValue.key = textx.Attribute("key").Value;
                textKeyValue.value = textx.Value;
                language.textKeyValueList.Add(textKeyValue);
            }
            languages.Add(language);
        }
    }
    // GetText will go through each language in the languages list and return a string matching the key provided 
    public string GetText(string key)
    {
        foreach(Language language in languages)
        {
            if (language.languageID == currentLanguageID)
            {
                foreach(TextKeyValue textKeyValue in language.textKeyValueList)
                {
                    if (textKeyValue.key == key)
                    {
                        return textKeyValue.value;
                    }
                }
            }
        }
        return "Undefined";
    }
}
// Simple Class to hold the language metadata
[System.Serializable]
public class Language
{
    public string languageString;
    public int languageID;
    public List<TextKeyValuetextKeyValueList = new List<TextKeyValue>();
}
// Simple class to hold the key/value pair data
[System.Serializable]
public class TextKeyValue
{
    public string key;
    public string value;
}


Some details about what is going on in this script : 


The class use DontDestroyOnLoad(this);  so the GameObject holding the script will stay in scene even after you load a new scene. You can add your localization gameobject on the first scene you load or use any other mean of scene management that you already have.


Using [SerializeField] over the languageFile List<> will embed that list in Unity inspector so you can easily drag and drop your XML file in there inside the editor. The script uses [System.Serializable] to embed the language sub classes in Unity inspector to easily visualise the data and help debuging. 


The variable currentLanguageID will define which language file to use. You can set this value any way you want, it has to match the ID value from the XML file you want to use. Here it is set to 0 so it will use the English.xml file since its ID attribute is set to 0. You could detect the system language to set this value to the system current language and use a menu / option that the player can change manually. 


The script in the inspector. You can drag and drop your xml file in the Language File List<> 


Localized UI Text component

You will also need a second script that you add to your GameObject with a UI Text component. Save this file as LocalizationUIText.cs


using UnityEngine;
using UnityEngine.UI;
 
[RequireComponent(typeof (Text))]
public class LocalizationUIText : MonoBehaviour
{
    public string key;

    void Start()
    {
        // Get the string value from localization manager from key 
        // and set the text component text value to the  returned string value 
        GetComponent<Text>().text = LocalizationManager.Instance.GetText(key);
    }
}


This script can be added to any GameObject with a Text component on it. It can be the Text Component of a button or just a label or whatever. This script simply calls GetText() from the LocalizationManager and populate the Text component text value with the string returned.


The [RequireComponent(typeof (Text))] line will add a Text Component to the GameObject to which you added the script, if there is not one already attached to it.


Add the script to a GameObject with a UI Text component. Set Key to the value you want to use in the XML file.


You can now specify the Key to use for this particular Text component text value. The text value will be automaticly changed by the localization script.


You can also use the LocalizationManager in other scripts, if you need to set a string in UI to different value programmaticaly, you can simply call the GetText() method with the Key you want to use.


string localizedString = LocalizationManager.Instance.GetText("START_NEW_GAME");


This will return the string "Start New Game" in the language specified by currentLanguageID from LocalizationManager.


To conclude

Well thats pretty much it. This is a very simple way to handle localization I think, there is ways to make extremely flexible localization system that will also handle images or sound, but I wanted to share a simple way to localize text, while still using an extenal file format that you can easily modify by hand. In The Shadows uses something similar to this altho I do handle image localization as well, but that was out of scope for a simple tutorial. Maybe this example will be useful to you or give you ideas for your own system.


This is the second part of a series of articles on my thoughts on creative process. This time I’ll be talking about my personal experience learning computer programming and electronics. You can read the first part here.


Atari 800XL

In 1983 Atari released the 800XL computer. Some years later, it became the first computer I ever used. Atari BASIC was very simple to learn. It was the best way to tinker with computers as a kid, messing with programs listings and trying to make interesting graphics.


Enlarge / My resident Atari kit sitting on my desk in my home workshop


8 Bit processors are very interesting. They are very simple in design by today’s standards. The limitations at the time made programming a lot easier in some aspect, even though you would program on a much lower level than with programming languages most used today. Peeking and poking memory locations directly. This was my introduction to computers and programming. For me using a computer already meant programming and creating, not using it passively to consume data the way computers are most used for today. 


Enlarge / Analog Computing. We used to type those program listings by hand.


Programming, production pipeline and workflow 

I studied programming for about a year, dropped out and went on to study 3D animation, putting code behind me. Funny thing is, while working in 3D animation, I realized how programming, or more precisely scripting could make my life so much easier. There is a lot of repetitive work in production and I would always script something to make my work go faster. I got obsessed with optimizing my work, to the point that years later, making CGI was not even on my mind anymore. The ultimate goal was to make the production of CGI more efficient. 


I ended up working on 3 different assets managers  and tracking softwares in my technical director career since 2006. Assets managers and trackers are interesting pieces of software. They are used to track your assets, schedules, communications, versioning, etc... during production. When you build a software like this, you really need to find the best way to optimize not only your own work, but also the work of anyone else working on a project. It require a lot of design on paper before doing anything at all, which is something I am not used to. One thing I do get obsessed with is finding the best workflow to work; it’s very meta in nature since the tool I’m designing can also help me work on the tool itself better. Eating your own dog food in software development is always interesting. I think for non devs to understand what software development means there is many book that touch the subject, but one that I enjoyed a lot is  “Dreaming in Code”.


After working in 3D animation for a decade you realise that some people think they can choose not to be technical for some reasons. I heard so many “artists” say that they “don’t want to be technical”. If you are working on a computer all day long... it’s your tool. You need to know some basic things about the inner working of your tool. Painters know how their brushes work, they know how to clean them and keep them in good working order. Know your tools. My quest for a perfect asset manager and tracker was really to make the perfect tool to work, finding a way to work as fast as possible. 


Putting it all together, Midi to Atari

I think that sometimes you need to have a clear idea of what you want to build and design. Sometime you might not have the exact skills needed for a particular task, but you can learn those skills. In 2013 I build a Midi to Atari Controller. I wanted to make music with the real, pure sound of an atari computer and I came up with a solution that was pretty neat using and Arduino controller. Arduinos are easy to learn, and you can do pretty much anything you want with it. 


Enlarge / Totally staged picture of electronic stuff in my home workshop


Here is how I came up with the idea and my thought process. I wanted to make chiptunes for a game project on my Atari 800XL. When you have a goal with a lot of unanswered questions it’s good to look at it from afar and break it down to solve all the possible problems one by one. A midi controller for the Atari 800XL means the following:


  • A way to send Midi signal to an Arduino board (electronics)
  • Process that signal on the Arduino (software)
  • Send that signal to the Atari somehow (electronics)
  • Process that signal on the Atari (software)


Programming with the 1980s Atari Basic was just not practical, so I started working with OSS “Action!”. It’s a programming language that looks and work a lot like C. It’s much easier to work with.


The way the whole thing work is simple. The Midi controller send a Midi signal that the Arduino read in serial. It’s a command, a note and a velocity. The Arduino then send a signal to the Atari using the two controller port. Using 8 inputs at the same time I could send 8 bit simultaneously. First the command byte, wait, then the note byte. Probably not the best way to do this but it worked! The Atari would then use the command and note to play back a tone. I wanted the synthesizer to be polyphonic and used all four channel of the Atari to play the same tone but with different pitch. This made for some interesting interference noise.


Midi to Atari in action, and the badly writen sofware I made in Action! being compiled and run.


When I learned electronics by myself I didn't know what to do with that knowledge, but I was so glad that I knew some basic stuff when I started working on the Midi to Arduino board. Also I can fix a bunch of electronic stuff at home now, turns out soldering skills is actually pretty useful.


Game development

I apply the same process when working on my game. The same kind of situation happened when I was trying to figure out how to make the game work with shadows and real-time lighting in 3D. If I have a problem, what can I use in my current skills set to solve it? It might not be the best solution, but if it works, it works. I can always go back to it and fix it later, but at least I got things done and had a result really fast. You should just do something, get something done, it doesn’t have to be perfect, but by working on it you might get new ideas and make it better later. Find the best way to do something really fast, because the faster you can make it, the faster you get a result, even if it's not perfect, at least you made something. It’s always better than doing nothing.


Working in 3D animation for such a long time then working on ways to optimize my work made me realise how much I loved programming, but I also missed making visual. I worked on a short film for a while, but ultimatly making a video game was always on the back of my mind. Making games seamed a lot harder back then, at least it was not as easily accessible as it is today. Now most people who play games know about engines and Unity or Unreal, the fact that there is tons of indie devs is common knowledge now. So I just took a chance, working on my small project, but did I? I knew how to make it before I started working on it really, I tried to figure out the best way to build my game, the fastest way. It still took 2 years at this point, and it's not done yet! 


In the next article I will talk about my creative process more in detail, how to be a one man team, being multidisciplinary and what I think it mean to be creative in my opinion.


I wanted to write about my creative process, but soon realised that there was a lot of background information needed to understand my point of view. I was asked before about my work in 3D animation before starting to do game development and I thought it could be interesting to share my experience. I will make a multi part post that will talk about my personal filmmaking experience, programming experience and what brought me to game development. My creative process is based on working alone, optimising my work and being independent, and this is the first part. I hope you find it interesting! Knowing about filmmaking helped me in my game development in many ways, if you are just starting like me it might help you as well!


How it started

When I was 16 we got our first modern computer in the house. My older brother would show me things made in 3D like demos and short animations. It was fascinating. He really pushed me to go study in that field, and ultimately that’s what I ended up doing after a failed year studying programming. 


I fell in love with 3D animation.


CGI 

3D animation back then felt “raw”. At the time, Softimage|3D was very rudimentary. Soon after,  Softimage|XSI  came out and things started to change. I already knew the potential of CGI, but learning it in school made me realise that it was possible to make an entire movie and telling a story by myself.


If you want to be serious about filmmaking, you need to learn the basics. Screenwriting, screenplay and storyboarding are the same for a film or a 3D animated movie. There is a lot of “old school” timeless books with tonnes of information on the subject that I recommend to read to anyone interested in filmmaking. You can tell a story only with moving pictures, you don't even need words.


Film directing shot by shot | Film directing cinematic motion | The filmmaker’s handbook


I worked in the industry for over a decade. CGI was fun for a while, but if you are a creative person and love your creative freedom, you realise quickly that working in a company doesn't allow you to be very independent, if at all. They call it creative work because you are supposedly an artist, but I never felt that way. You do whatever someone else tells you to do. I did learn a lot while working with others and that was the most important thing really. I worked as a 3D polygonal modeler for a couple of years, specializing in character modeling, then with time I started working more on facial rigging and expressions. As an “all-rounder”, I worked doing lighting, texturing, rendering, rigging, animation, compositing and applied as much as I could in my own work . Being multidisciplinary in any field is always an advantage and CGI is one of those fields where there is  so much to learn, so much to do and it's in constant evolution. Still, I wanted to make a movie all by myself. The fact is that CGI was not even important. CGI was just a tool. I didn’t want people to look at my movies and think of it as a CGI movie, I wanted them to look at it because it’s a movie.


Softimage|3D & Softimage|XSI , the first 3D software I learned. Those were the days


My Short film : Waste of Space

In 2011 I started working on a personal project, a short film about space exploration, combining two things I am deeply passionate about: space and filmmaking.


Watch on Vimeo / Waste of Space: My short film from 2012


Everything was done in CGI. I wanted to make everything myself and I was finally able to do it. This is the culmination of years of self teaching, exploration and curiosity, then applying all this knowledge in different fields to achieve one goal; making a movie. 


Enlarge / A shot from Waste of Space


Getting work done by your lonesome

When you make a movie by yourself, or any kind of project as a matter of fact, you need to have a vast array of different skills. You have to be independent at least to some extent.  Sometimes you don’t have time to ask for help, you want to work fast, cut corners. Things might not be the best they could, but they are good enough. There is no time to be obsessive about details, there is no time to stop to ask for advices. Once you master a set of skills, you will know where to cut things that will have the least impact on the final result. You are the only one who have the big picture in your head. You know where to put priorities.


Movies are the easiest of art form to consume while being one of the most time consuming to create. CGI movies have an advantage though; you don’t need actors, you don’t need lights, camera, sets, you don’t need to go to a location or rent anything, you can do anything you want on your own computer at home. It just takes time, and that’s why optimising your time become the most important thing you need to do. I might not be the best in any areas, but being proficient in all those different skills help me attains goals by myself. Those same goals that over specialised people, nitpicking over every little details, could never do without a team. Sure, someone who does only texture could say my texture need work, but I don’t have time for that because I was busy lighting, rendering and animating. 


Enlarge / Some storyboard panels for Waste of Space.


I optimize my work as much as I can by storyboarding shots and trying to figure out the fastest way to make them. I will cut corners, I will throw away a shot because it’s too long to make and I will make the shots that get the more bangs for the bucks. I apply this in everything in my life. How can I get 90% of the results with 10% of the effort? Production value.


Enlarge / A shot from Waste of Space


Production value is crucial when you are independent. When you do everything by yourself, you need to find shortcuts like figuring out the best way to do something that look like months of work even though you crushed it in a week. After all this time learning about CGI, I applied all of my knowledge on my short movie. At the time I could not have known that I would use all of this for one specific goal, but you never know when you learn something today how you're going to use it tomorrow. 


To conclude

I think it’s important to learn a lot about unrelated things, then combine them to make something new with a fresh perspective that someone specialized in any of those field would not have. By doing so, you have the big picture. I believe it’s important to learn how to do things by yourself, to be independent, to have fast turn arounds. I believe everyone can be passionate about something, in fact many things. All those things might combine one day and you will find a path you did not expect. 


In my next article I will talk about programming and creativity and the path that brought me to game development.